Lizard QGIS plugin
The Lizard QGIS plugin enables users to download their scenario results directly from the Lizard API to their GIS environment and show them as WMS layers. On this page you will find how to install, setup and use the plugin.
Installation
Note
Note: if you are using the 3Di Modeller Interface the Lizard plugin repository is already added.
- Add the Lizard plugin repository
In the main menu click Plugins > Manage and Install plugins > Settings
In the section Plugin repositories, click Add
As details, fill in ‘3Di’ as Name, and ‘https://plugins.lizard.net/plugins.xml’ as URL
- Install the Lizard plugin
Click on the tab All
In the search bar at the top, search for Lizard
Select Lizard in the panel in the middle
In the bottom-right of the dialog, click Install plugin.
Initial setup
The Lizard plugin consists of two components: the plugin and its settings.
Before you are able to start the plugin, you are required to provide an API key within the settings. If you do not provide an API key first, you will receive a pop-up with the following message:
There is no Lizard API key defined. Please set it up and try again.
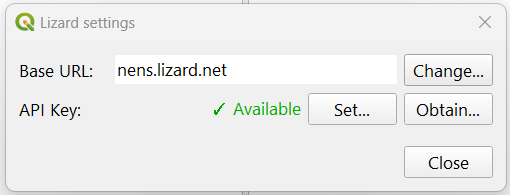
Which is followed by the settings menu. There are only two settings to worry about:
Base URL: this is the Lizard portal you would like to acces. This will typically be your_organisation.lizard.net.
API Key: your personal API key. You can provide one by clicking Set….
If you do not have a Personal API Key yet, follow these steps:
Click Obtain… You will be redirected to the management page where you can create a new Personal API Key.
Create a new Personal API Key by pressing the + NEW ITEM button in the upper right corner.
Fill in a name for the new Personal API Key. Click on Submit to the right.
You now have your own Personal API Key. Copy it.
Return to QGIS / the 3Di Modeller Interface.
Click Set… and paste your Personal API Key. Then click Save.
Lizard browser
The Lizard plugin currently contains a Simulations results section and a Rasters section.
Simulations results
The simulation results section consists of three compartments: scenario selection, scenario items and feedback.
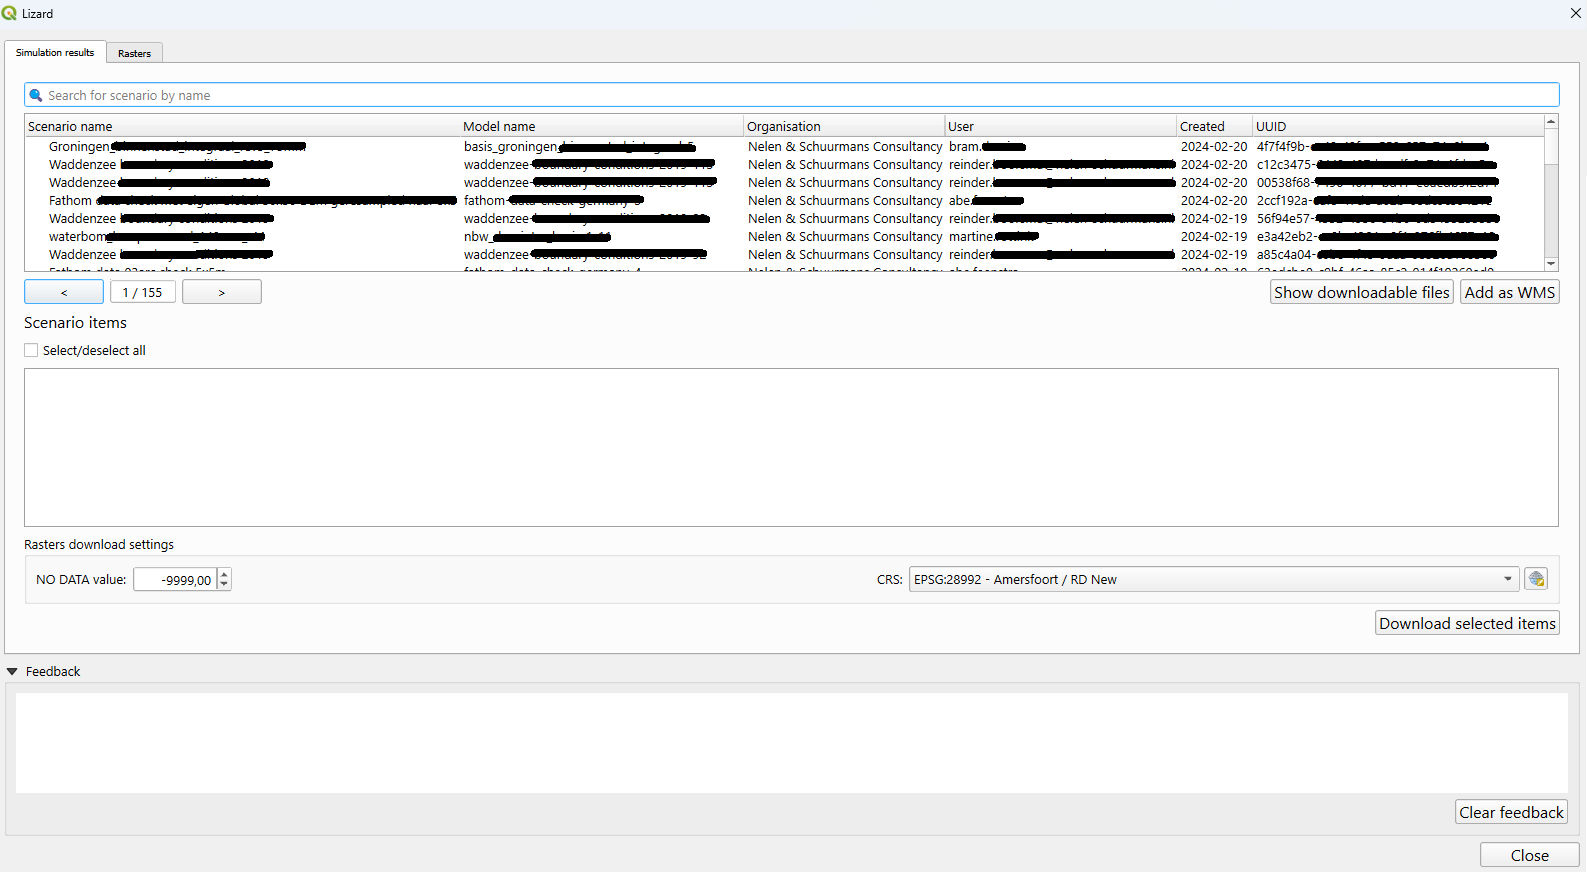
The scenario selection, which can be found at the top of the section. With the search bar a scenario can be found. Once a scenario has been selected two options are available, below the scenario overview on the right:
Show downloadable files: will display all downloadable files in the middle compartment.
Add as WMS: adds all downloadable layers as WMS into your project.
Within the scenario items compartment all results are shown. Downloadable results will be black, others are shown as grey.
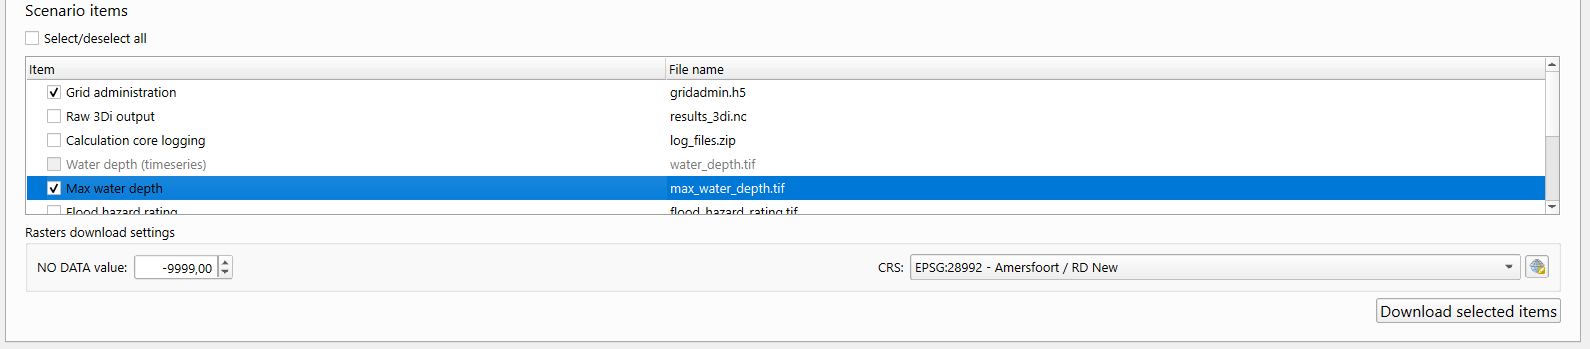
To download results:
Select the results of interest
[Optional] Set nodata value and projection that the downloaded rasters should get.
Start the download
Follow the progress at the top of the QGIS main window.
Temporal layers are currently not available to download can be shown as WMS layers. To inspect their changes over time: use the Temporal Controller<https://docs.qgis.org/3.28/en/docs/user_manual/map_views/map_view.html?highlight=temporal%20controller#time-based-control-on-the-map-canvas> to animate temporal raster results (e.g. water depth).
The last compartment consists of feedback. Within this section the actions of the plugin are reported. Some examples are:
Scenario download task added to the queue.
Scenario download finished.
WMS layers for scenario added to the project.
If an action fails for any reason this will also be reported in the feedback compartment.

Rasters
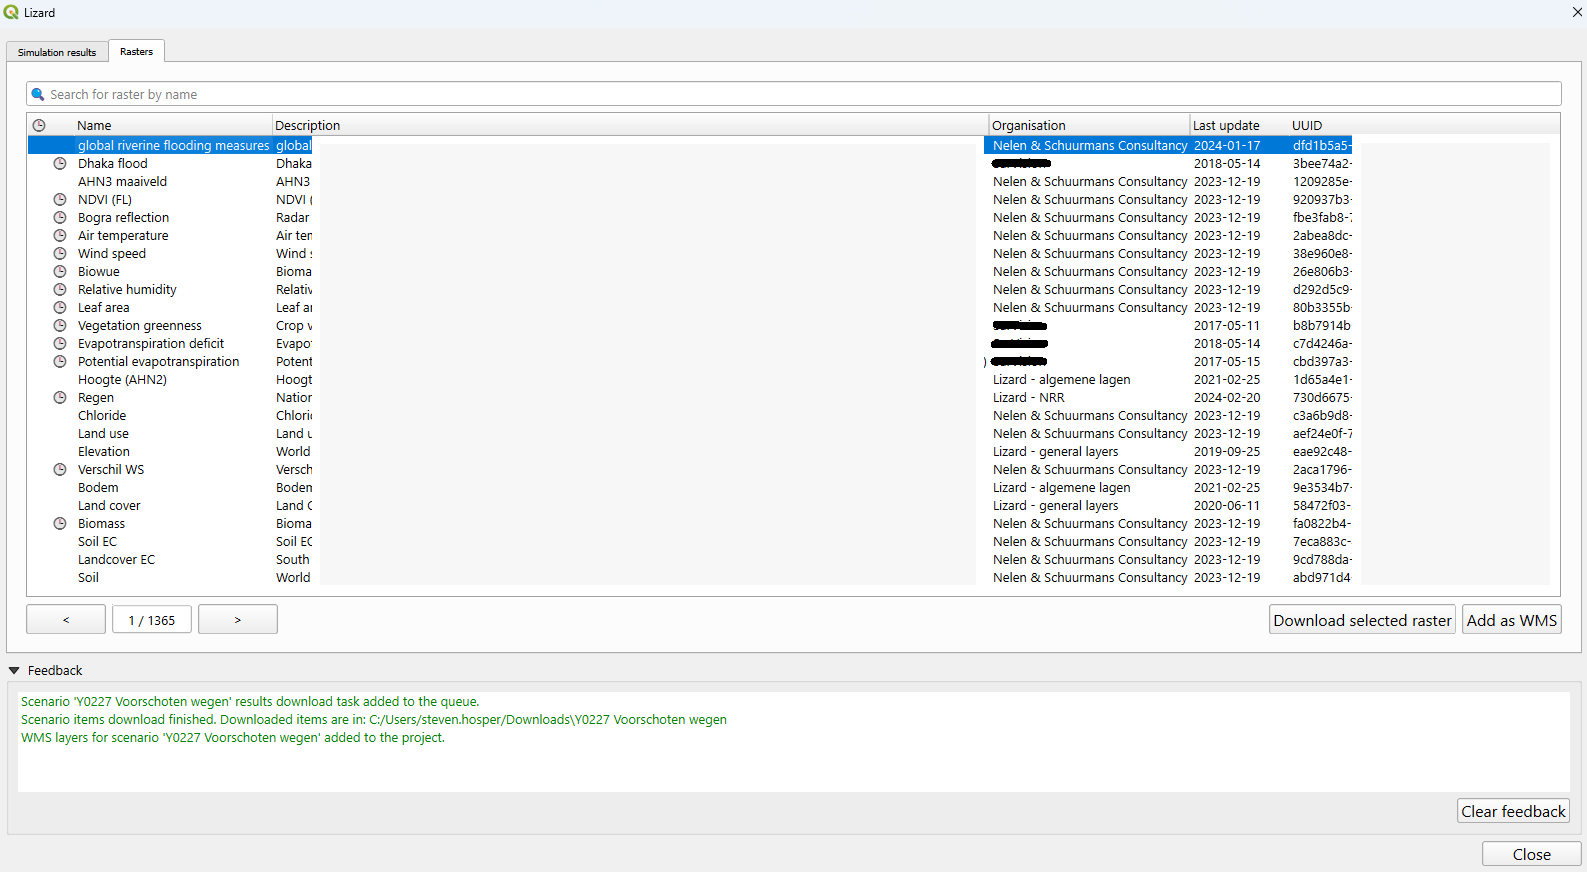
Accessing rasters through the Lizard plugin works like the scenario’s, except that scenario’s contain multiple rasters. Temporal rasters can only be used as WMS layers. Static layers can be downloaded.
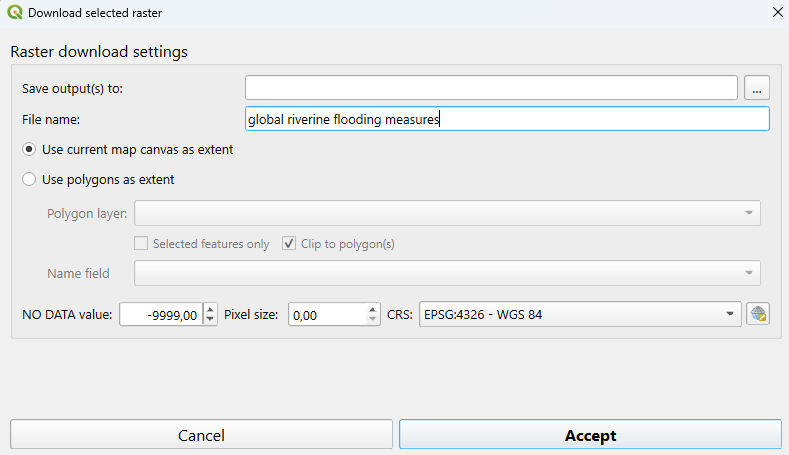
To download a raster multiple settings can be provided:
The output folder: the folder in which the file will be saved.
The filename: the name of the file.
- Map extent based on:
Map canvas: the part of the raster that is shown on the QGIS map canvas is exported.
Polygons: the polygon provided is used to export the project.
No-data value: the value which represents no-data available.
Pixel-size: the size of each individual pixel
CRS: coordinate system.
The use of polygons deserves some additional explanation. To use polygons as export extent it is first of all required to have a polygon layer. Once a polygon layer is selected two check boxes are available. * Selected features only: Only polygons that are selected within the project are used to download the raster. * Clip to polygon(s): default is True, determines if the edges of a polygon are used as its borders. If it is unchecked a rectangle will be drawn around the polygon, this rectangle will be exported.
If multiple polygons are available within a raster you either have to use the checkbox Selected features only and select one or more polygons, or you have to provide the namefield of the Polygon you want to export.
The last compartment consists of feedback. Within this section the actions of the plugin are reported. Some examples are:
Scenario download task added to the queue.
Scenario download finished.
WMS layers for scenario added to the project.
If an action fails for any reason this will also be reported in the feedback compartment.