Authentication and User Management
Signing in
Users that already have a Lizard account can click the “Log in” button on the top right of the screen.
First-time users require an invitation to create a Lizard account. Users with a “manager” role are able to send invitations to new users. If you do not know whom to contact, please contact our support office (servicedesk@nelen-schuurmans.nl).
After clicking “Log in” or after following the invitation link, you will arrive at the login screen.
Note
Please ensure that “https://auth.lizard.net/” domain is indeed displayed in your browser’s address bar and that your browser displays the lock symbol indicating that the connection is secure.
On the login page you have four different options to sign in:
through a company account,
through a social account,
with username and password,
by creating a new account (Sign up).
Note
To sign up you an invitation from an organisation is required. Without an invitation you will be unable to create an account.
First-time users may choose any of these options. If your company is listed as one of the possible companies to sign in with, that is the preferred choice.
Existing users should use the same method as they used when signing in for the first time. If your Lizard username/password existed before Januari 2021, use method 3.
Tip
Do you want to add your company to the list to centralise the user accounts of your organisation? Please contact our support office (servicedesk@nelen-schuurmans.nl) for the options.
Organisations
Most data in Lizard is linked to an organisation. This is used in multiple ways, think of: whitelisting sources data, filtering or providing access to certain datasources. Further more, it provides organisations and its members with the ability to manage their own users and data. There are three types of authorisation options that can be applied to your data, with:
Public [0]: everyone is able to access your data
Common [100]: everyone with login credentials to Lizard is able to access your data
Private [200]: everyone with login credentials to Lizard AND user rights to your organisation is able to access your data
Note
Access modifiers can be set as codes or as strings. So both providing ‘Public’ or 0 will work.
Whitelisting
The users of a certain portal may not be interested in a lot of the public/common datasets that are made available by others. To combat this issue, whitelisting exists. When you whitelist an organisation, its (public) data will become visible. Every Lizard portal has its own whitelist. Whitelisting allows the organisations to be selective in their data, limiting clutter. The whitelist affects both the Lizard Viewer aswell as the Catalogue.
The effect is that for the same user the available data can differ between [your_organisation].lizard.net and demo.lizard.net (for which all organisations are whitelisted). The whitelisting mechanism is overruled if a user has specific authorisation for an organisation.
Tip
Do you want to see or change the whitelist settings of a portal? Please contact our support office (servicedesk@nelen-schuurmans.nl).
Roles
We have 4 roles and 3 different types of privileges.
User: can only read data
Supplier: can read and change (‘write’) his or her own data
Administator: can read and change (‘write’) all organisation’s data.
Manager: is allowed to grant roles to different users. A manager can not read or write data by default. To achieve this, one of the other roles has to be assigned seperately.
User management
In the User Management interface all relevant information related the users of your organisation is available. This interface can be reached via the {your_organisation}.lizard.net/management/users/ (or demo.lizard.net/management/users).
Note
You require the “Manager” role to access the User Management interface. Please contact the application manager within your organisation or our support office (servicedesk@nelen-schuurmans.nl) if you would like to manage the users of your organisation.
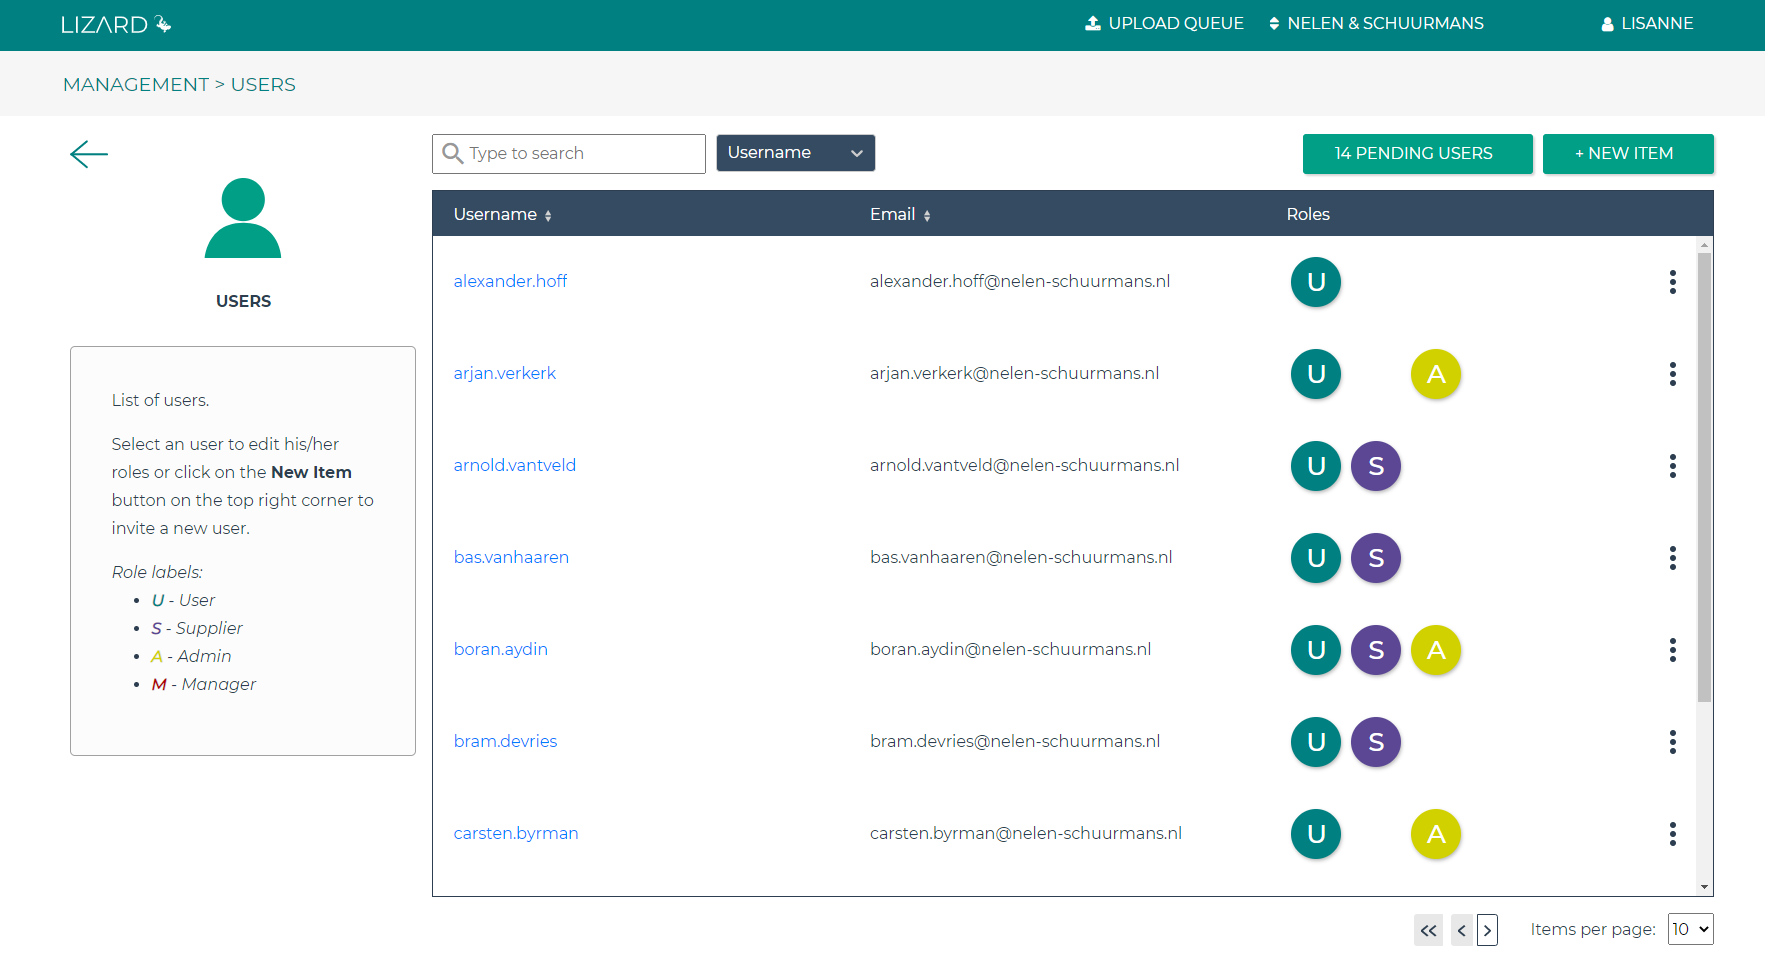
Image 1: In the example above, you see the current rights for 7 users under the organisation Nelen & Schuurmans.
A manager in the user interface can:
Invite new users.
Manage invitations.
Adjust existing rights.
Inviting New Users
If a new user needs access to Lizard from the organization, this can be granted by the Manager. This is done as follows:
Log in to the organization’s portal ({organization}.lizard.net).
Go to the user section in the management screen ({organization}.lizard.net/management/users).
Click on + NEW USER at the top right of the screen (Image 1, in red).
Type the user’s email in the ‘email’ field (Image 2).
Select the roles the user will have. For the rights associated with the roles, refer to Roles.
Click SAVE.
Success! The invitation has been sent and will be in the new user’s mailbox within 5 minutes.
Tip
Clicking on a role when inviting someone will also display the rights of each role on the left side of your screen.
Tip
If the email does not appear in the inbox after 5 minutes, first check your spam folder. If the invitation is not there either, you can always contact the servicedesk.
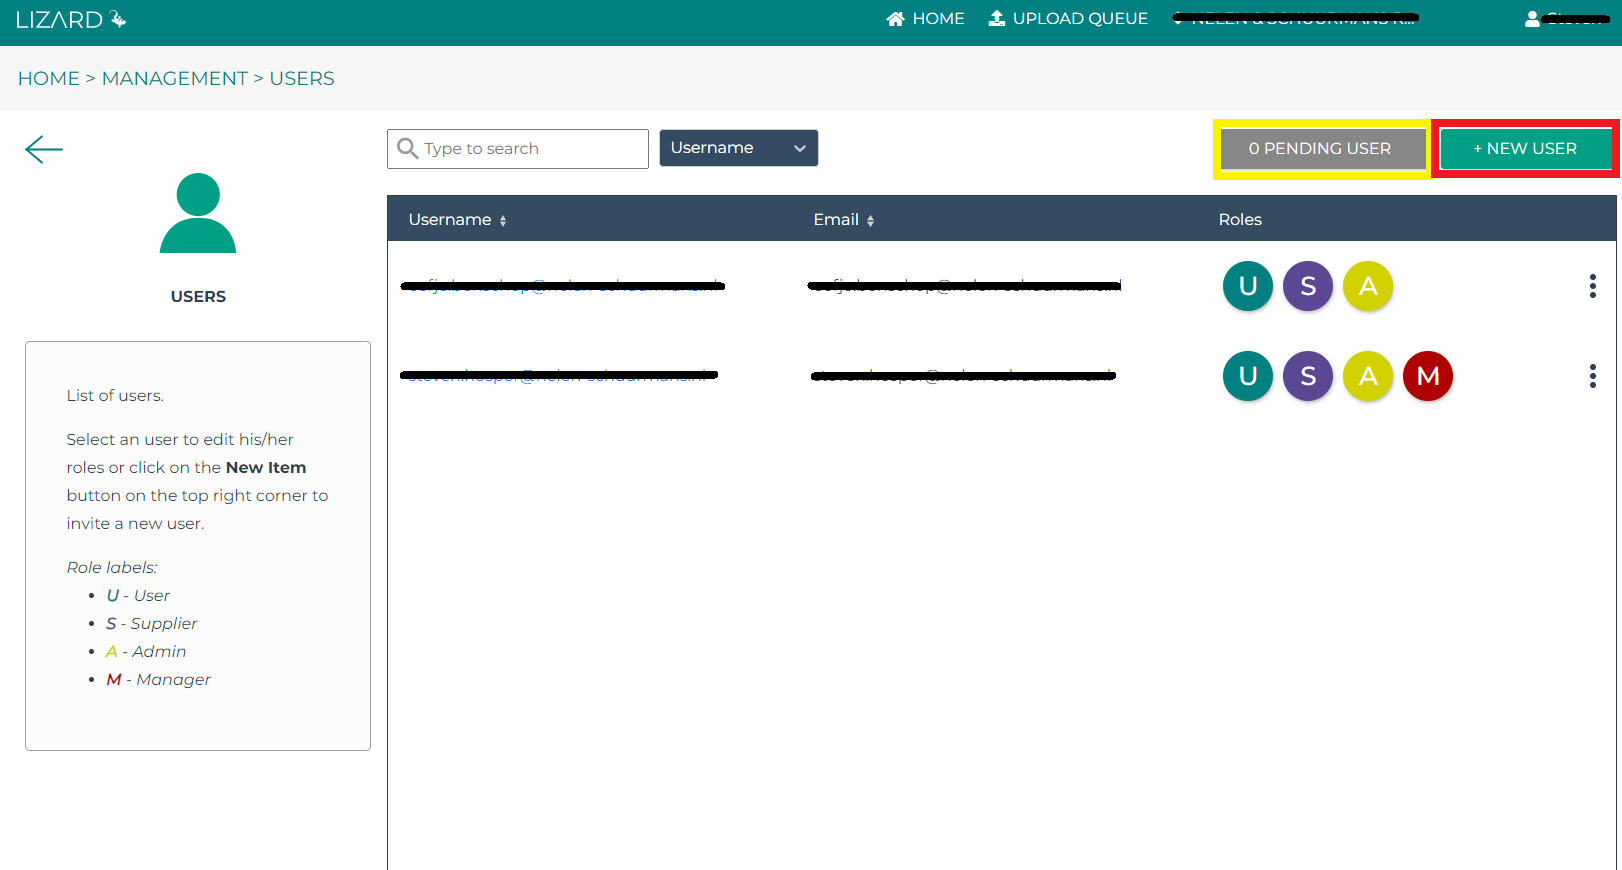
Image 2: An overview of the user section in the management screen of Lizard. Here you can view existing rights and invite new users (red) or manage pending invitations (yellow).
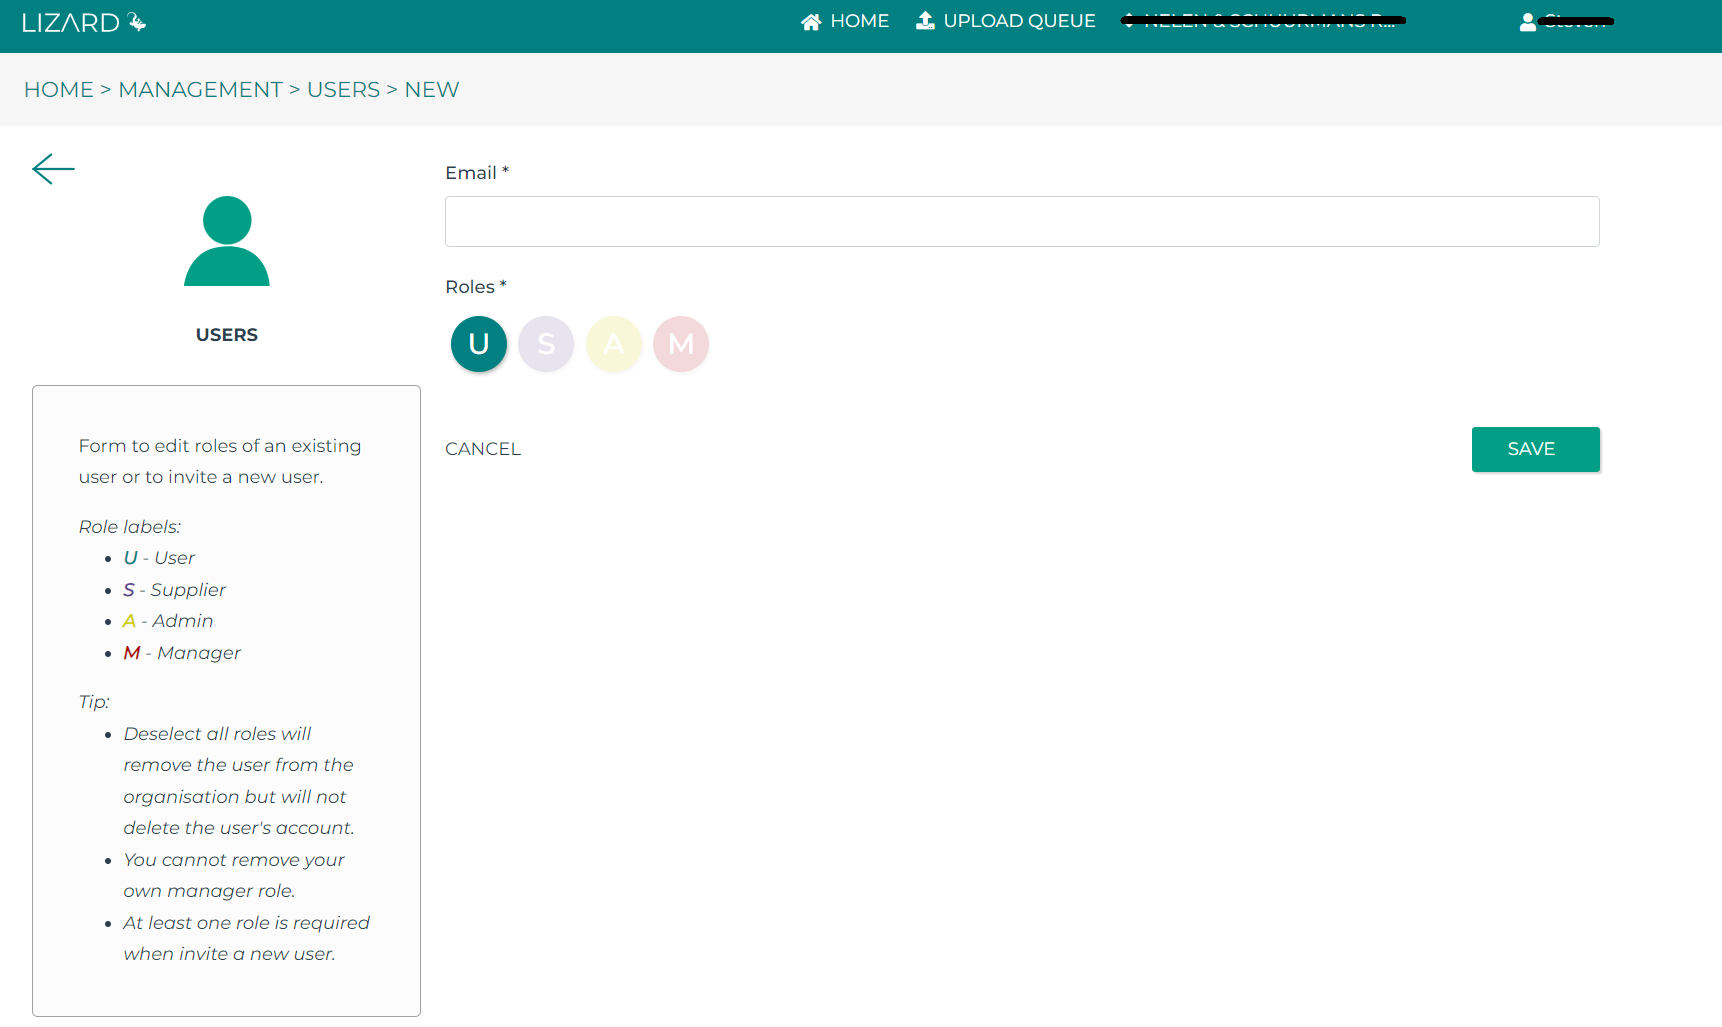
Image 3: The invitation screen for new users. You select the roles by clicking on them.
Managing Invitations
In the Pending Invitations screen, you can see which invitations you have sent that have not yet been accepted or expired. Invitations expire by default within 15 days, but you can cancel them earlier by clicking on the 3 dots next to an email (Image 3). If an email has not reached a user, you can also verify the email here.
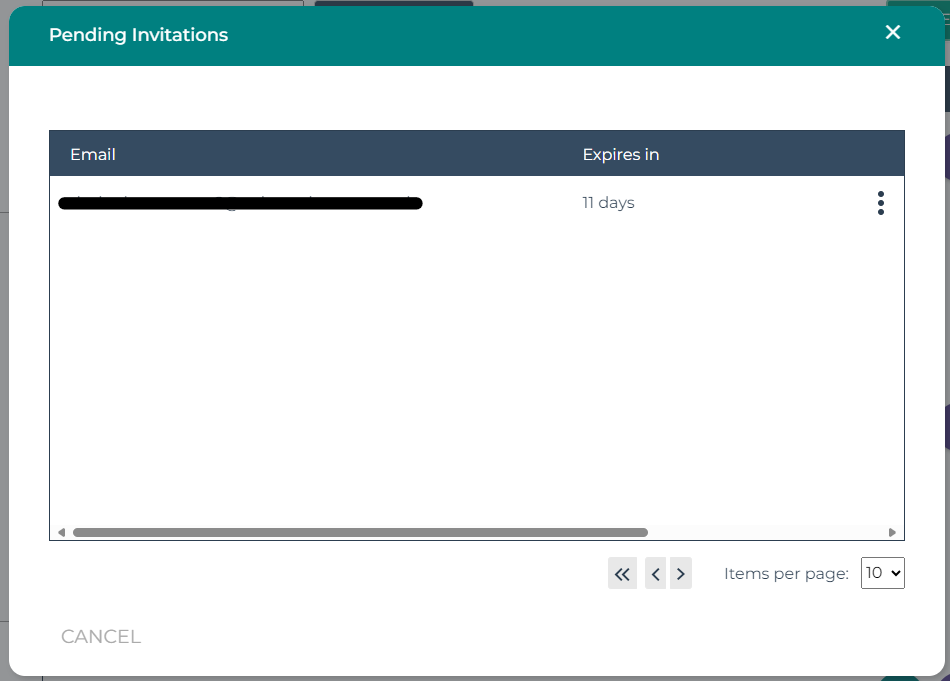
Image 3: An overview of pending invitations.
Adjusting Existing Rights
In the user rights overview screen, you can manage the rights of existing users. Here you see the following information of users who have rights for your organization:
Username
Email
Roles
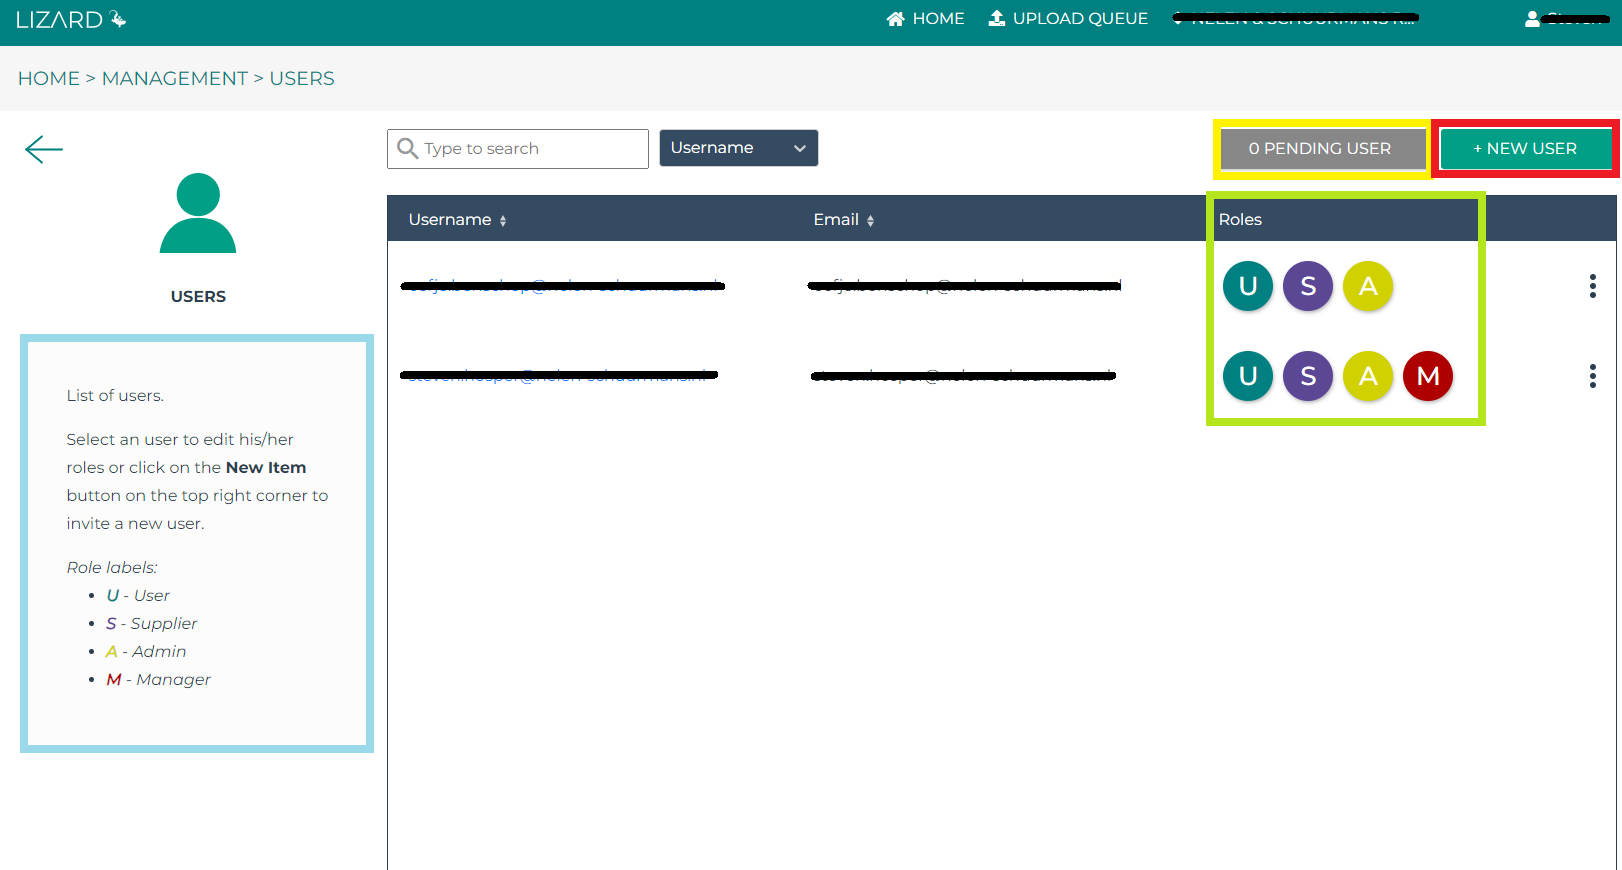
Image 4: An overview of pending invitations.
By clicking on the username of the respective user, you will be taken to this user’s specific page. Here, you can click on the roles you want to remove or add. If a role is clearly colored, the user has these rights.
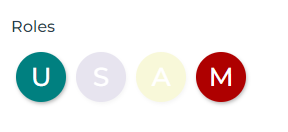
Image 5: In this case, the user has ‘User’ and ‘Manager’ rights.
Tips
Tip
Ensure that rights are discussed and granted at the beginning of a project. This prevents delays later due to someone waiting for their rights.
Tip
Don’t forget to remove users’ rights after a project is completed. This way, you actively maintain the user database and keep your data under control. However, be sure to check if any scripts are running on an API KEY of any of these users.
Tip
If you want to deactivate accounts, contact the servicedesk.