Managers
What are the tasks of a Manager in an organization
The role of a manager is important for managing the data of an organization. As a manager, you grant or revoke rights for your organization. A manager mainly has two tasks:
Maintaining the rights of existing users
Granting rights to new employees or external parties
Maintaining rights of existing users
The rights of users under your organization do not expire automatically. So, it is important that you regularly check whether users still need their rights. This can include employees leaving the organization or projects coming to an end. Sometimes, not all rights need to be revoked, this is also possible. It is up to you to determine how often you want to perform this check.
Granting rights to new users
If a user needs rights for your organization, you are responsible for granting them. For the smooth progress of a project, it is useful to handle such requests promptly. Granting rights also doesn’t have to be a lengthy task; rights can be granted in a minute. You can learn exactly how this works in Inviting New Users and Adjusting Existing Rights.
Tip
Use a bookmark to go directly to the Management page. This way, you can give a user rights in no time.
Roles and rights
User
For every project collaborator, internal or external, who needs access to the organization’s private data. These are only “read” rights, meaning this user cannot modify or add data.
Supplier
Project collaborators who need to modify or deliver data require “write” rights. This falls under this role. As a supplier, it is only possible to deliver and modify your own data, not that of other users (within the organization). However, a user with only supplier rights can still view publicly available data.
Administrator
An administrator has both “read” and “write” rights. This means the rights of User and Supplier come together in this role. Additionally, with these rights, there is the ability to modify the delivered data of others.
Manager
The manager gives and takes rights from others. A manager can also revoke the rights of another manager. So, make sure to only give manager rights to trusted parties.
Tip
In some situations, organizations arise for specific projects. If the data within this project falls under your organization and you want to appoint a manager for this, please contact the servicedesk.
The management screen
The management screen offers the opportunity to manage various aspects of your organization. This includes managing your data: rasters, scenarios, time series, and more. For complete use of this page, refer to the lizard documentation. The most important thing in this case is “User Management”. Only managers have access to the “Users” screen. In this screen, you can:
Invite new users.
Manage invitations.
Adjust existing rights.
Inviting New Users
If a new user needs access to Lizard from the organization, this can be granted by the Manager. This is done as follows:
Log in to the organization’s portal ({organization}.lizard.net).
Go to the user section in the management screen ({organization}.lizard.net/management/users).
Click on + NEW USER at the top right of the screen (Image 1, in red).
Type the user’s email in the ‘email’ field (Image 2).
Select the roles the user will have. For the rights associated with the roles, refer to Roles and rights.
Click SAVE.
Success! The invitation has been sent and will be in the new user’s mailbox within 5 minutes.
Tip
Clicking on a role when inviting someone will also display the rights of each role on the left side of your screen.
Tip
If the email does not appear in the inbox after 5 minutes, first check your spam folder. If the invitation is not there either, you can always contact the servicedesk.
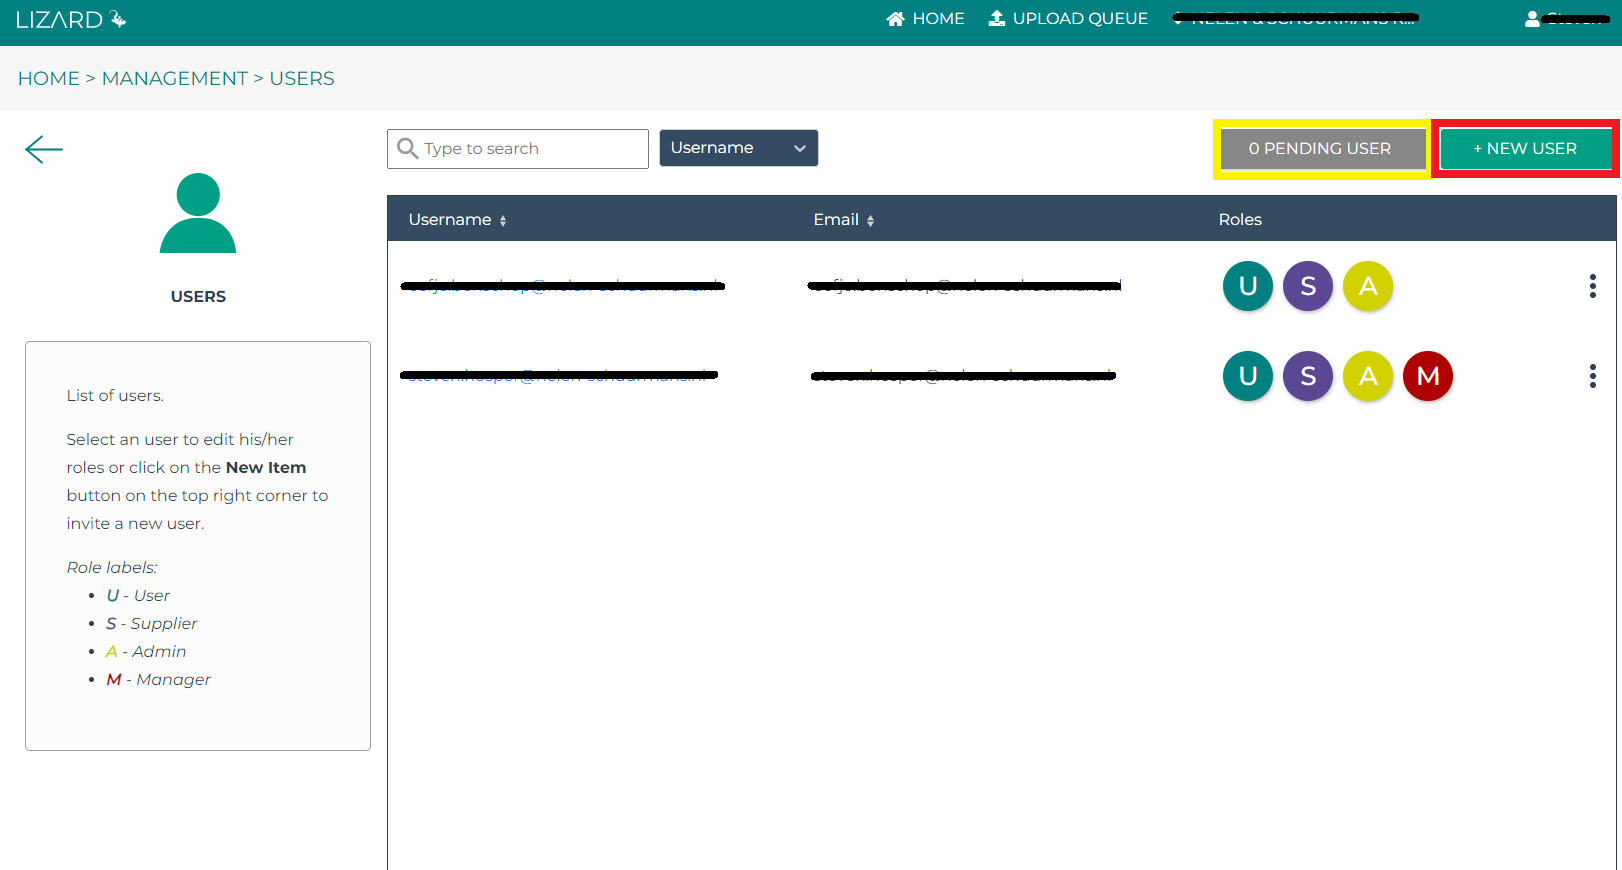
Image 1: An overview of the user section in the management screen of Lizard. Here you can view existing rights and invite new users (red) or manage pending invitations (yellow).
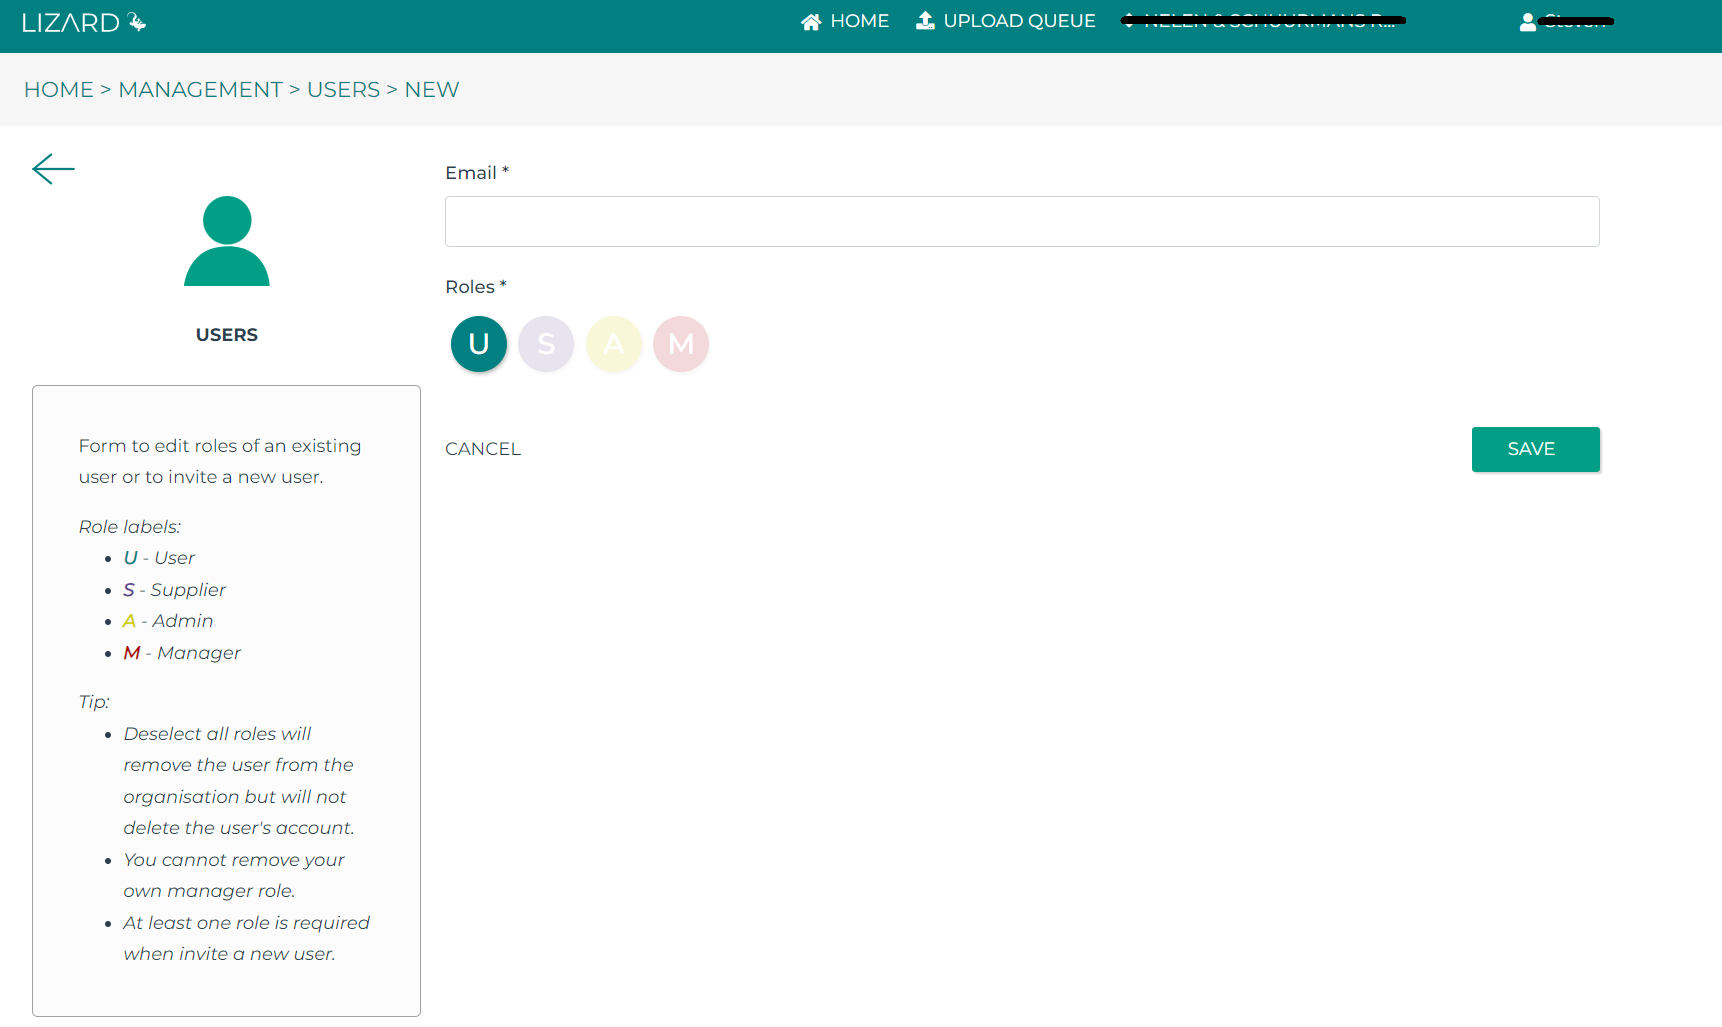
Image 2: The invitation screen for new users. You select the roles by clicking on them.
Managing Invitations
In the Pending Invitations screen, you can see which invitations you have sent that have not yet been accepted or expired. Invitations expire by default within 15 days, but you can cancel them earlier by clicking on the 3 dots next to an email (Image 3). If an email has not reached a user, you can also verify the email here.
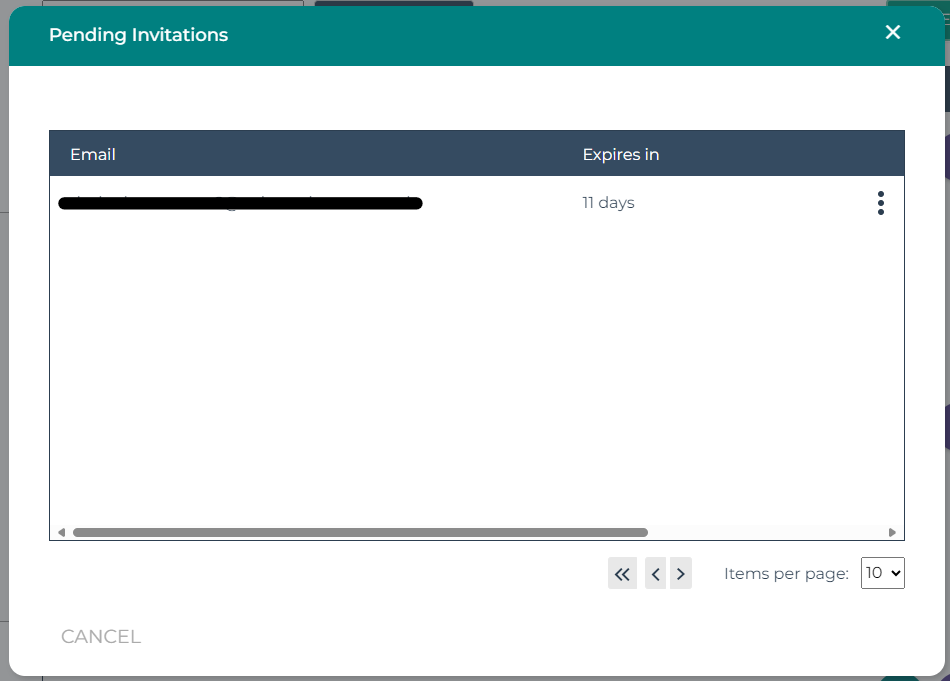
Image 3: An overview of pending invitations.
Adjusting Existing Rights
In the user rights overview screen, you can manage the rights of existing users. Here you see the following information of users who have rights for your organization:
Username
Email
Roles
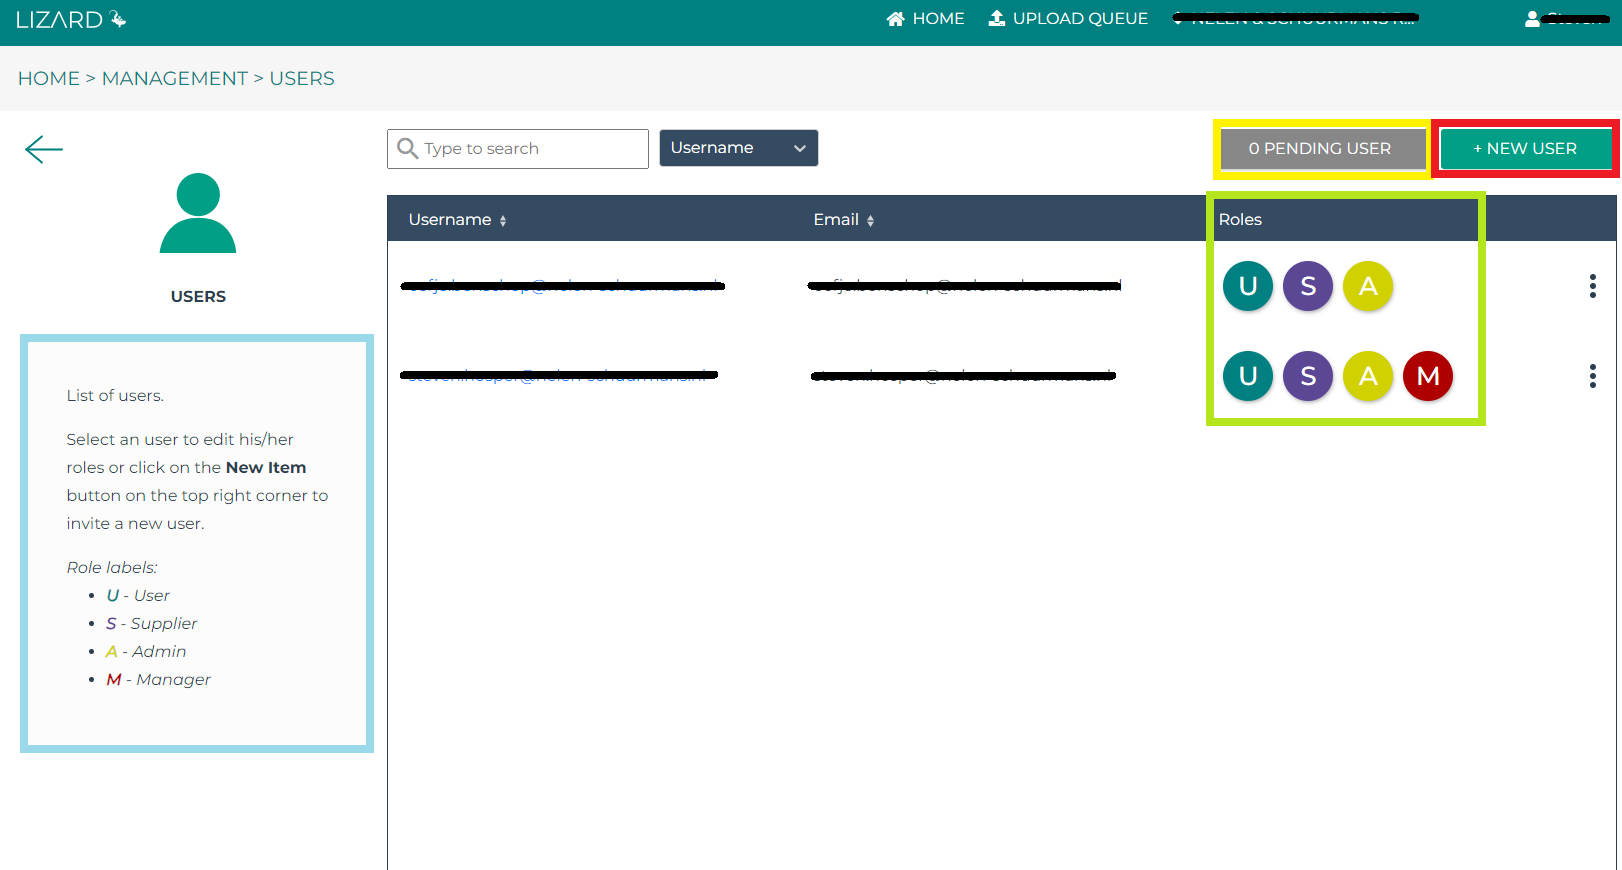
Image 4: An overview of pending invitations.
By clicking on the username of the respective user, you will be taken to this user’s specific page. Here, you can click on the roles you want to remove or add. If a role is clearly colored, the user has these rights.
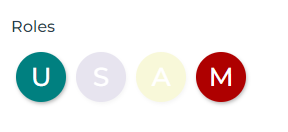
Image 5: In this case, the user has ‘User’ and ‘Manager’ rights.
Tips
Tip
Ensure that rights are discussed and granted at the beginning of a project. This prevents delays later due to someone waiting for their rights.
Tip
Don’t forget to remove users’ rights after a project is completed. This way, you actively maintain the user database and keep your data under control. However, be sure to check if any scripts are running on an API KEY of any of these users.
Tip
If you want to deactivate accounts, contact the servicedesk.